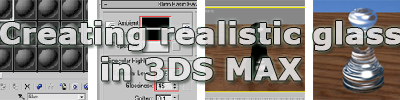
In this tutorial you will learn how to create a realistic glass material and turn our chess pawn into a realistic glass object. Key terms include reflection, refraction, opacity, and fall-off. This tutorial is aimed at the beginner, but since there are several ways to create glass, it might be interesting for everyone else as well.
Although this tutorial is based on 3ds Max, the same settings apply to many other 3D products. Note: Click on the thumbnail in each step for a larger screenshot that includes the viewports and the relevant portion of the user interface.
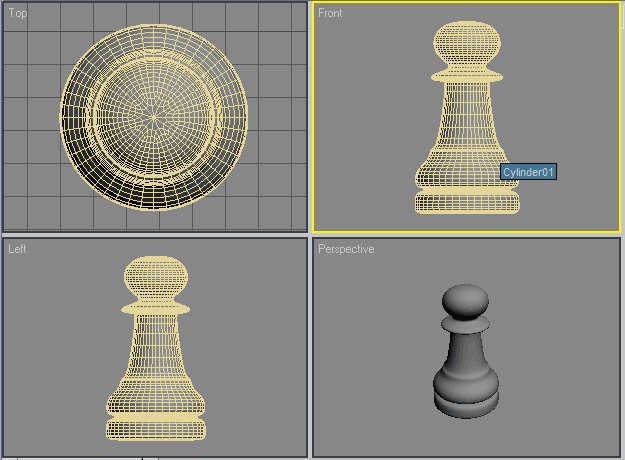
Step 1 Because this tutorial covers only how to create the glass material you need to add an object to your scene yourself. This can be anything from the simple pawn we use (download the chess pawn here) to the sophisticated high detail models you create.
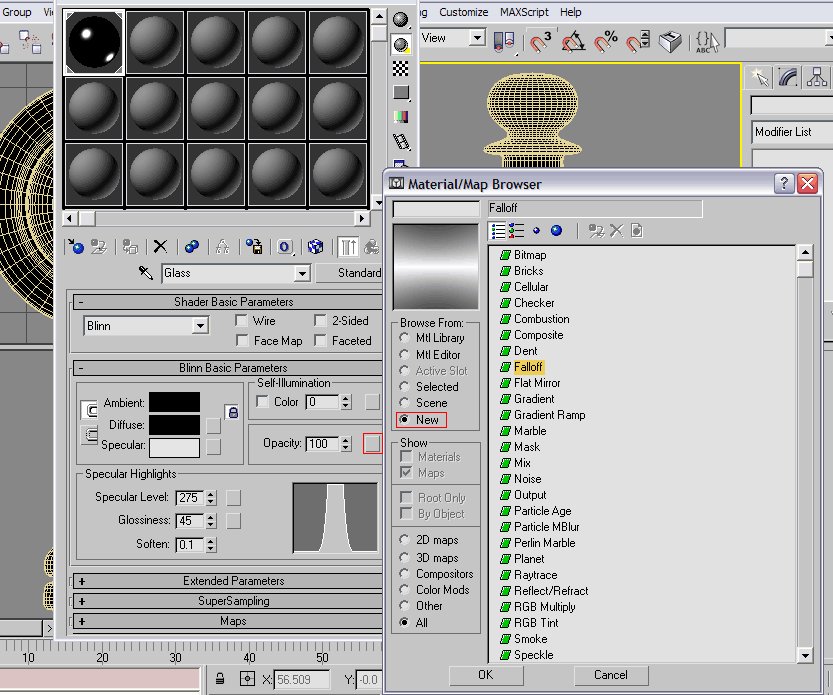
Step 2 Press the M key to open the Material Editor (or select Material Editor from the Rendering menu) and rename the first material to Glass.
Drag the material to your object in the scene to assign it.

Step 3 Set the Ambient and Diffuse color of the material to black. And set the Specular Level to 275 and Glossiness to 45.

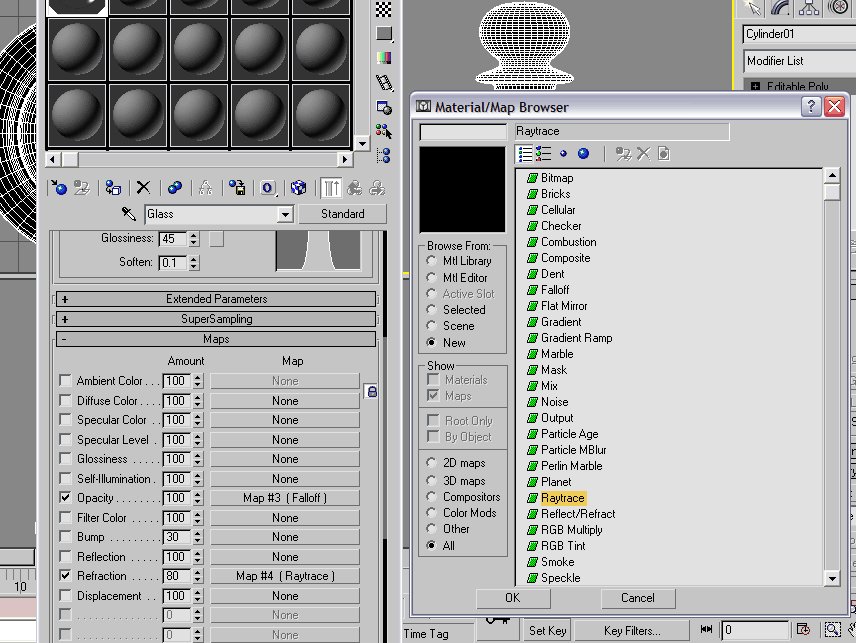
Step 4 Click on the blank square button after Opacity and add a Falloff map. Set the Falloff Type to Fresnel (click here for an additional screen shot).
Go up one level, back to the Glass material, by choosing Glass from the drop down menu (where it says Map #3, see the additional screen shot.)
Step 5 Now that the main Glass material is select again, scroll down in the Material Editor and add a new Raytrace map in the Refraction slot. Set the Refraction level to 80.
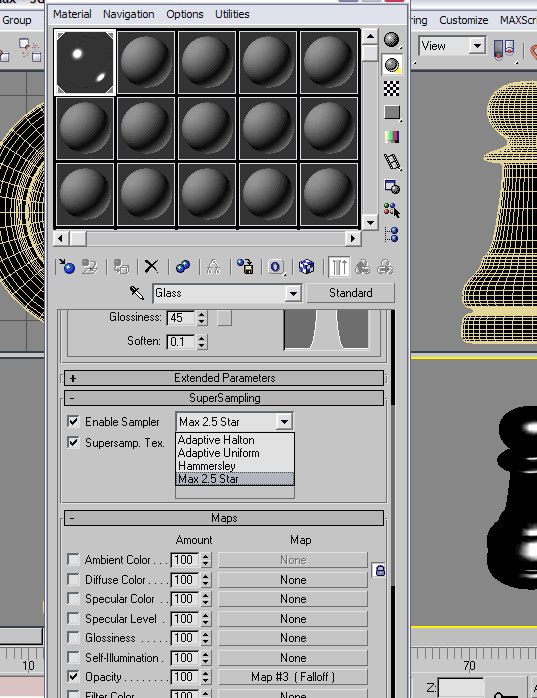
Step 6 To make the reflections and the colors smooth, instead of grainy, you will have to enable Supersampling for the Glass material (just above the Maps rollout. Enable the option Enable Sampler and choose a method from the list. In most cases the Max 2.5 Star will do just fine, but if your machine can handle it, you can try others that may give better results.
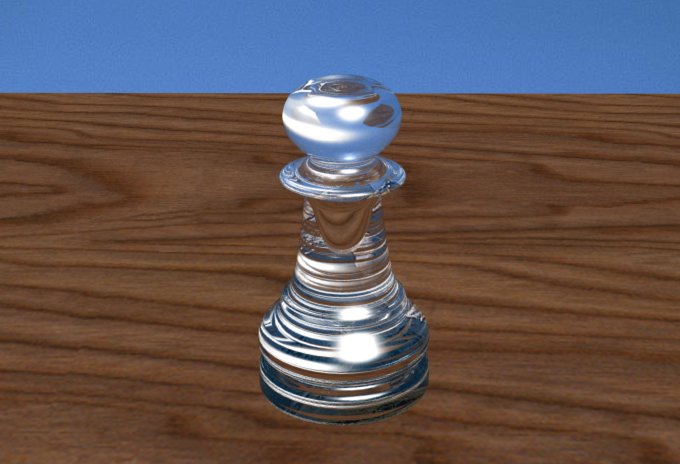
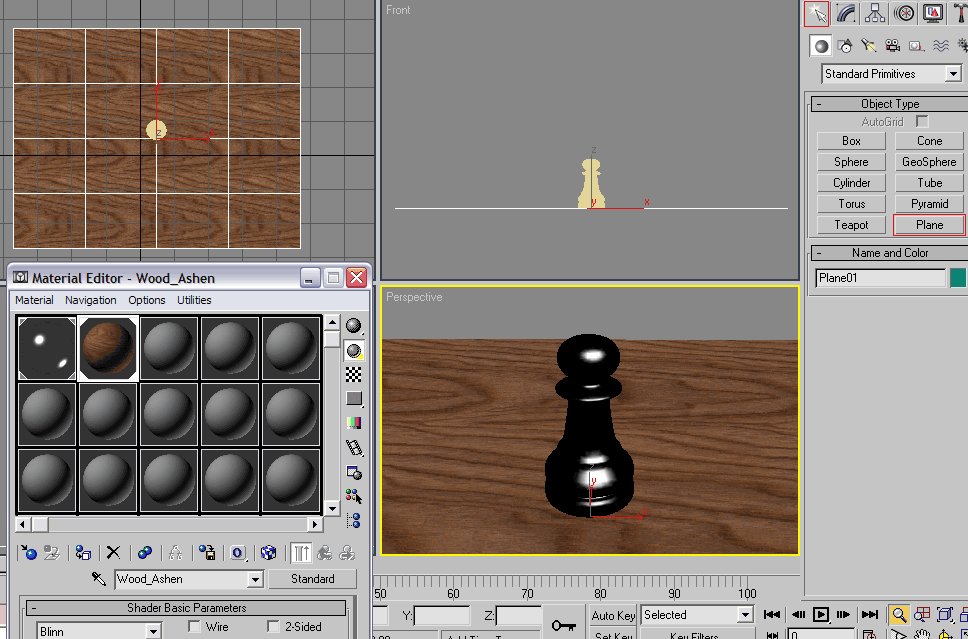
Step 7 You can press F9 now to do a quick render, but it won’t look much like glass yet. First you will need to make some changes to your scene, the environment. Remember that glass is almost entirely transparent and can be seen only because of the reflections of light and objects in its surroundings.
Let’s start with adding a ground plane. Assign it a wood material from the Material Library (we used the default Wood_Ashen). Make sure the plane is large as shown in the screen shot.
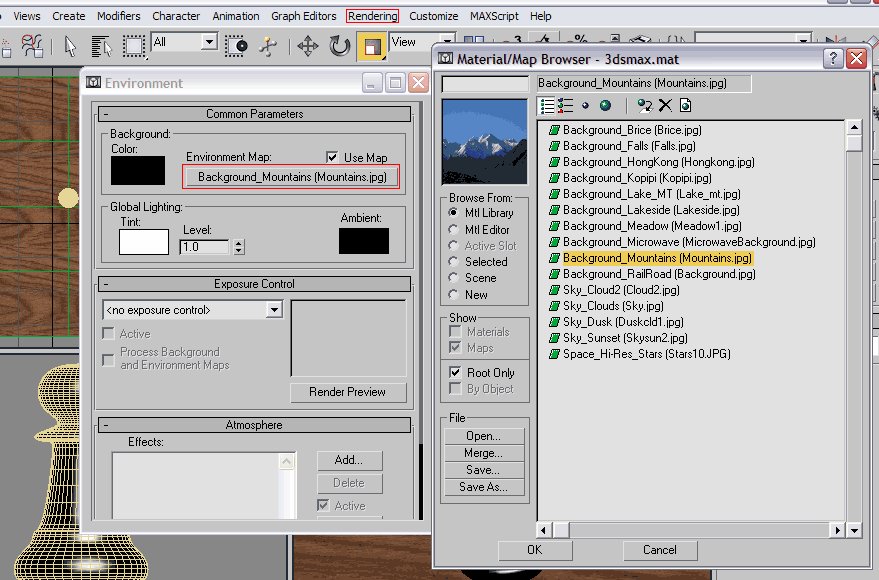
Step 8 Next, let’s makes some changes to the environment as the glass will need something to reflect. You can add object and a sky and such yourself, but for the sake of this tutorials an environment map will do. From the Rendering menu, select Environment (or press 8). Click the big empty button below Environment Map and select Background_Mountains (or any other background) from the Mtl Library.
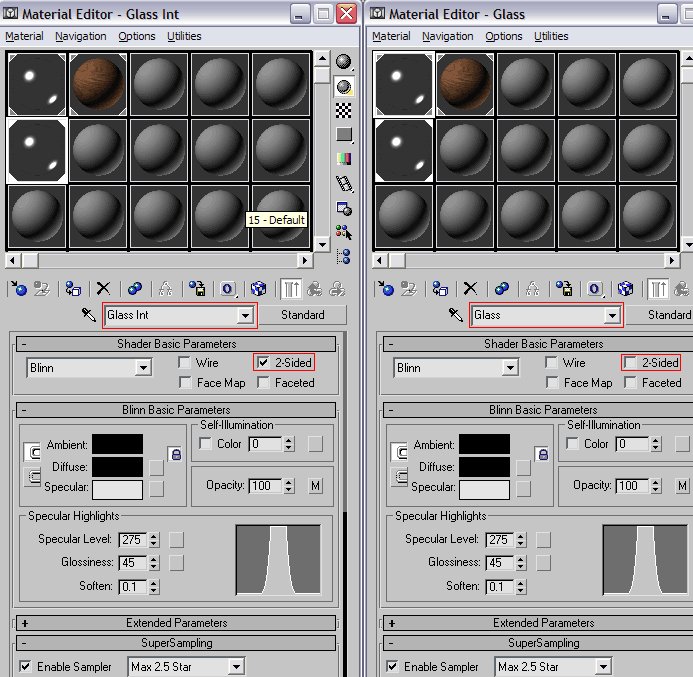
Step 9 If you render your scene again, you will see it will look very different and really “glass-like”. However, there are ways to make it more realistic. You could start by enabling the 2-Sided option for the Glass material. This will allow us to see the inside of the model. Click the thumb on the right for more info.

Render again, and notice the difference, if any. The results won’t always look good, depending on the model.
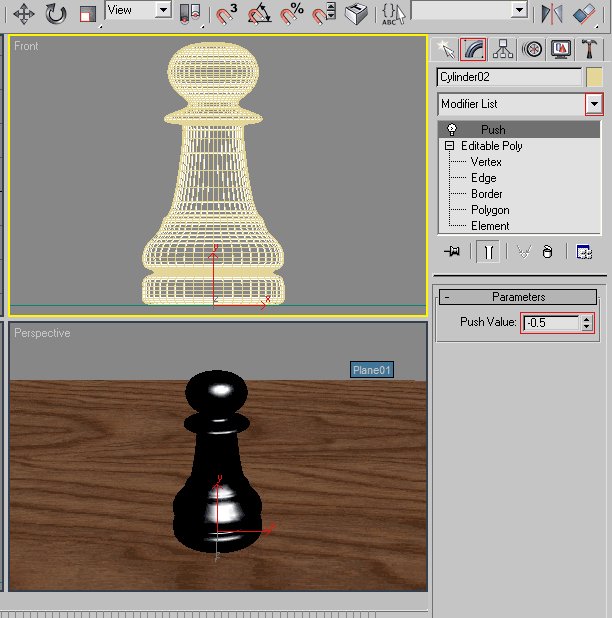
Step 10 Let’s try another trick I like to use to make the glass more realistic, although it will make the glass object a hollow object (which is fine for many glass objects and often even desired). Select your object and press CTRL-V (select Copy and click OK) to clone it. Apply a Push modifier to the clone and set the push value to -0.5 (try other values after rendering to check which works best for your model).
Step 11 In the Material Editor make a copy of the Glass material and name it Glass Int. Make sure the option 2-Sided is enabled for the Glass Int material but disabled for the Glass material. Assign the Glass Int material to the clone and make sure the original Glass material is assigned to the outside model.
Step 12 Render again (F9 or F10) and notice the difference. You should end up with something similar as shown on the right. The actual result will depend mostly on the geometry of your model and its environment. Try out different background and check out the results.